
When I first walked in to my local hobby store, I was overwhelmed by the sheer number of Gundam kits on the shelves. Not to mention, the different scales and variations you had to choose from. Then, you discover all the different tools you need to build them and all the items you need to further customize and complete them, like panel liner and topcoat.
There’s a lot that goes into it, and while it may seem intimidating at first, Gunpla, as a hobby, is something you’ll get the hang of quickly with practice. With that said, I wanted to go ahead and break down the different tools and information you’ll need to get started with Gundam modeling. When I first started, guides were extremely helpful, so I wanted to create my own in hopes that it will be helpful to you as well!
What You Need To Know About Gundam Modeling
- A Comparison of Gunpla Grades
- Building Tools You’ll Need to Get Started
- Assembling Kits
- Finishing Touches and Customizations
- Painting Kits
- Panel Lining Kits
- Waterslide Decals
- Topcoat
- Where to Buy Gundam Model Kits
Before I talk about how to build kits and the different tools you need to do so, I first want to talk about the different Gunpla grades you can build.

A Comparison of Gunpla Grades
Gunpla kits come in different grades, and the five most common ones, from smallest to largest, are:
- Super Deformed (SD)
- High Grade (HG)
- Real Grade (RG)
- Master Grade (MG)
- Perfect Grade (PG)
The main differences between these grades is their scale and the level of detail each offers.

Super Deformed (SD)
Scale: N/A
SD Gundams are as the name would suggest, deformed. They are “squashed” chibi-ish versions of Gundams, and they have a very unique style that makes them fun to build. They are quick to build since they are the smallest of the grades. They are highly affordable with most SD kits being priced around $8.99 USD.
I personally have fun building these as an adult from time to time, but they are also great for kids if you are looking to get them into the hobby.

High Grade (HG)
Scale: 1/144 or 1/100
Like SD kits, High Grades are some of the most affordable kits. HG’s, in particular, are a great place for beginners to start. As you are in the learning process, it’s much less stressful to mess up a $16 dollar kit than it is to mess up a $50+ one.
These are kits that are made to look like the Gundams, but in a smaller 1/144 or 1/100 scale. That being said, they take up less space when displayed than most grades on this list. They aren’t as detailed as others on this list and they do not come with an inner frame, but they are easier to build and are great for beginners.
Note: There are 1/100 scales of other grades, like Master Grades, which can be confusing at first. The HG’s will just say 1/100 on the box, but the Master Grades will be marked with MG, so that’s how you can tell the difference between the two.

Real Grade (RG)
Scale: 1/144
Real grade kits come in at the same scale as high grades, but they have greater detail and better articulation. Unlike HG’s, they come with an inner skeleton frame that really sets them apart when it comes to posing. Don’t let their smaller scale deceive you though, because they are difficult to build; Mainly because they pack so much in such a small scale. With that said, I don’t recommend these for beginners.
Some would argue they have a similar, if not better, quality than Master Grades, so they offer a lot for for their lower price-point. The lower end of RG’s are priced around $30 USD. I still recommend building HG’s when you are just getting started, but RG’s are another more affordable option you can look into.

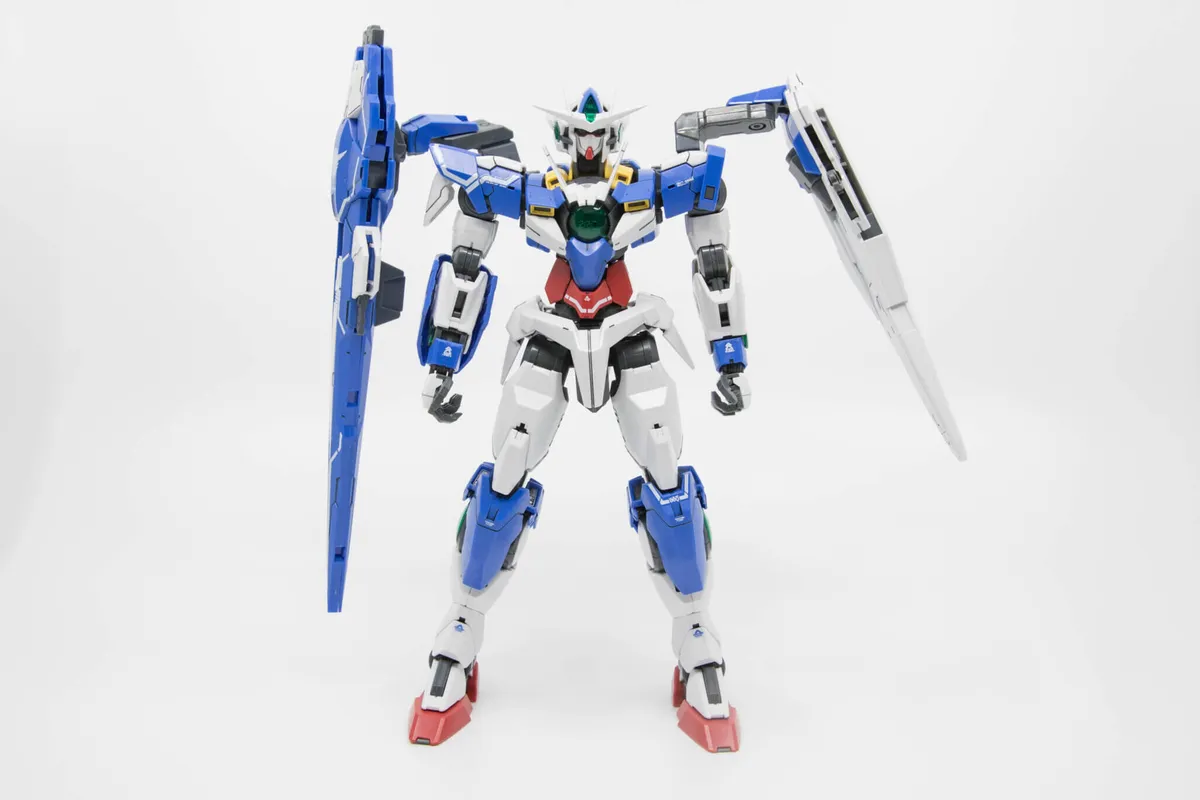
Master Grade (MG)
Scale: 1/100
Master Grades come with great detail thanks to their larger 1/100 scale and quality. These kits come in at higher price point with the lower end selling around $40 dollars, but most sell at $60 and above.
They come with more and better decals, especially the ver. Ka kits. They come with an inner skeleton frame that gives them better articulation. You can even put LED lights in these to make them stand out even more, but you are limited to where you can place these in MG’s.
With their higher price-point and the level of skill needed to build them, I do not recommend Master Grades for beginners. These kits are something you have to look forward to, because they look absolutely amazing when built. Their coloring is usually more accurate, and they don’t always need paint to look great when displayed.

Perfect Grade (PG)
Scale: 1/60
Perfect Grades are around 11 inches tall, so they are one of the largest scale kits you can buy. They are the most expensive option on this list since they come with a ton of parts and have a larger scale. As a result, they have amazing detail and look great on display. Furthermore, they have the most gimmicks out of all the kits listed. While MG’s will have lighting in specific areas, like the GN Drive or chest, most PG’s feature lighting throughout the entire kit and have effect options.
They are a challenge to build, so this is something you’ll have to work your way up towards. With the price of most perfect grade kits being $200+, it took me many HG kits, and after that many MG and RG kits before I had the confidence and skill to build one.
And there you have it, those are the different grades of kits you can buy. I recommend starting with High Grades in the beginning and working your way up as you get more practice. Next, I want to talk about the tools you’ll need to build kits.

Building Tools You’ll Need to Get Started
The main tools you’ll need to get started with Gunpla are: A self-healing cutting mat, nippers, a hobby knife, and sanding tools. Check out my recommendations below!
Self-Healing Cutting Mat
There are many different brands of self-healing cutting mats that you can buy at hobby stores, like Michaels, or you can pick them up online at places like Amazon. I recommend getting a decent-sized one, so you’ll have a large enough workspace.
I personally have a 24″ x 18″ size one that I purchased from Amazon here. When I first started, I used a much smaller one and I quickly learned that there just wasn’t enough space to work on, so I picked this larger one up instead.
Nippers
A good set of nippers is needed for cutting pieces off the runners. You really want a sharp pair, so they are less prone to leaving stress marks on your kits’ pieces. I’ve used many different nippers over the years, but I personally have grown to love the Single Blade Nipper 2.0 from USA Gundam Store the most. They aren’t crazy expensive and they cut cleanly and precisely.
Hobby Knife
After the pieces are cut off the runner, you will have some nubs you will need to clean up via sanding or scraping. The best tool for scraping is a hobby/exacto knife. I’ve used many knives over the years to do these touch ups, but the one I’ve found to be the most reliable and effective is the Tamiya Design Knife. Others had the tops of their blades break too easily, but I’ve had a much better experience with this one. It’s extremely precise and I’ve found it easier to control than others as well.
Right now, these are harder to find in the US, but I personally purchased mine off of Amazon.
Sanding Tools
One of the biggest mistakes I made when starting out was sanding with just normal sandpaper on every edge, whether it be straight, curved, rounded, etc.
I use the GodHand File Boards for straight-edges. They are just boards, so you will have to purchase adhesive backed sandpaper or sandpaper with double-sided tape to use them. They ensure that you will evenly sand along the whole edge of a piece and really keep straight-edges crisp and clean.
For rounded or curved edges, I use GodHand sponge files, which aren’t rigid like the file planes and have more give that allows you to curve them with the piece. These really keep your curved and rounded edges looking how they should when sanding down nub pieces and marks.
For both, you’ll want to get a variety of different grits from coarse to fine since each nub or nick will need to be sanded differently depending on their severity. For larger imperfections, you’ll need a coarser grit, whereas small touchups will only require very fine or fine grits.
Assembling Kits
Each kit you get with come with an assembly manual that will guide you on the steps you’ll need to take to build the kit. The instructions are written in Japanese, but the images and diagrams are more than enough to lead you through building the kit.
The first thing to do is to take the runners out of the box. Since there are multiple runners, I like to organize them alphabetically, so I can find them easily as I build. Usually, each part of the kit will require pieces from different runners.
The arms, for example, usually have base pieces that build the structure of the arm, armor pieces, and PVC pieces for joints. Each of these will come on a different runner since they are either made of a different material or are made in a different color. This is why it’s good to have them organized in a way that you can easily access them, because you’ll need to pull from different runners during each step of the build.
Since all of the pieces come attached to runners, you will have to cut them out with nippers to assemble them. Don’t cut right against the part as this will, more often than not, leave stress marks. Instead, leave just a little bit of the runner’s plastic on the piece when you cut it off.
Once cut from the runner, nubs will be leftover. To touch these areas up, I use a hobby knife, scraping slowly and gradually from the side until the area is flush with the rest of the piece.
Finally, I use my sanding tools to smooth the area over if needed.
While building my first kits, I made a lot of mistakes, so be prepared to do so. Don’t stress too much about stress marks, nicks, ect, because they are bound to happen in your first builds. It’s a learning process, but you’ll get the hang of it with practice!
Finishing Touches and Customizations
While it’s not required you do these steps, there are some finishing touches you can add to your kit, like paint, topcoat, panel liner, and waterslide decals.
Some of these may be things you want to practice later on as you gain more experience with building Gundam model kits, but there are some like panel liner and topcoating that are easier to learn as you are starting off.
If you are like me, and you just like to jump in to a hobby 100%, then you may want to do all of the following. Not only do these steps make your kits stand out even more on the shelf, but they further personalize and customize the kit into something more than just the standard look of the model.

Painting
Before you add anything like panel lines and decals, you’ll first want to paint your kit if that’s something you are wanting to do. In the beginning phases of Gunpla building, this may not be something you are wanting to do. If you aren’t looking to hand paint, which takes a lot of skill and trial and error, you will have to invest in some pricier tools, like an airbrush, air compressor and paint booth–if you don’t have good ventilation.
In terms of a decent airbrush to get started, I use the Iwata-Medea Eclipse and it has worked great for me. The compressor I paired with it is the Paasche Airbrush DC850R but there are a lot of other great ones out there like the Iwata-Medea Power Jet Lite. There are definitely cheaper options than this but with compressors I’ve found you get what you pay for as I’ve had about three different ones at this point and the cheaper ones just didn’t hold up over time.
While this is somewhat more advanced, I still want to talk about it for those of you who are wanting to know more about customizing and painting your kits.
I first want to say that paint contains harmful chemicals that you shouldn’t breathe in. If you are going to airbrush your kits, make sure you are doing so in a well-ventilated area wearing a mask, and/or using a paint booth.
Airbrushing is my chosen method to paint kits, but if you are looking to just finish off a kit, you can purchase spray cans of topcoat in semi-gloss, gloss, and matte finishes as well. But, topcoat needs to be applied after adding decals and panel lining if you plan to include those details. I’ll talk more about topcoating later on since it will be the final step in the process.
With that said, if you are planning to paint your kit with an airbrush you should layer paint on gradually. And to ensure you get bold, crisp colors, there are different paints you should use, like base coat, main coat, and topcoat, and they should be applied in a specific order.
Airbrushing Steps
- Take apart the pieces you are wanting to paint
- Attach model painting alligator clips to the underside of kits if possible. If not, use sticky tack to attach the sticks to the bottom. Basically, you can attach these anywhere the paint isn’t going to touch or show. These kits usually come with a stand base as well that you can place pieces in to dry.
- Ensure your airbrush is clean before use
- Apply surface primer gradually to ensure a smooth finish
- Clean airbrush with airbrush cleaner after each new paint is used to prevent mixing and clogging
- Apply layers of main color gradually to ensure a smooth finish until the color is to your liking. I personally use Mecha Color acrylic paint by Vallejo
- Apply topcoat. Remember, if you are looking to panel line and decal your kit, you’ll want to do so before you topcoat
- Clean airbrush with airbrush cleaner after you are done painting for the day
There’s a lot more that goes into painting, so I’ll go more in-depth about this in a later post if that’s something you are interesting in!

Panel Liner
After I finish building a kit, I move into the panel lining phase. Panel liner is a thin accent color that is applied with the pinpoint brush that comes in the top. When touched to the edge of a panel line, it flows against the line to highlight details. Once fully dried, any excess liner or errors can be cleaned or touched up using enamel thinner. I personally use craft cotton swabs dipped in thinner to clean up my panel lines, because they leave little to no residue and have a super fine tip that prevents you from over-cleaning the lines.
You can use Gundam Markers to panel line, but I personally prefer the liquid liner. It’s also important to note that panel liner comes in different colors, like black, gray, and brown, so you can panel line in different colors depending on the kit and how stark or soft you want your details to be.
Note: You’ll want to panel line and clean up your panel lines before you add any decals, because you don’t want panel liner getting all over them. You won’t be able to clean panel liner off decals, so it’s important you do these steps first.
Items Recommended for Panel Lining
- Tamiya Panel Line Accent Color Paint
- Mr. Cotton Swab (Super Fine) Craft Cotton Swabs
- Testors Model Master Paint thinner
Those are my recommendations for panel lining, but everyone has their own preferences!

Waterslide Decals
Most kits come with sticker decals you can apply to your kit, but there are other decal options available if these aren’t to your liking. My favorite decals are waterslides.
Waterslide decals have a clear background. They barely show edges when applied, so they really have the most finished look out of all the decals in my opinion.
Tools Needed for Applying Waterslides
- Tweezers
- Cotton swabs
- Water decal tray
- Toothpicks
How to Apply Waterslides
Here are the steps I take to apply waterslides:
- Cut out the decal you are wanting to apply with a hobby knife with enough space around the edges to pick it up with tweezers
- Carefully use tweezers to pick up the decal from the edges
- Fully submerge the decal in a decal tray or water basin
- After sitting in the water for 15 seconds, remove the decal with tweezers
- Use a cotton swab to gently push the decal off the backing onto the area of the kit you want to place it on
- To move the decal, use a toothpick to gently slide it into its final spot.
- Gently roll the swab over the top of the decal to remove air bubbles
- Once dried, you can apply Mr. Mark Setter to the decal so it will be locked in and won’t move. Lightly apply it around the edges. After it has set for a few seconds, roll a cotton swab over the decal to remove any excess liquid.
- You can also topcoat the kit to further set these details, which I’ll talk more about later on. Some people skip the Mr. Mark Setter step and just topcoat instead, so that’s an option as well.
Important Note: Do not touch water decals. Use tweezers, toothpicks and cotton swabs to handle or move them, so your fingerprints don’t leave impressions on them.
There are a lot of kits out there that don’t have officially released waterslides, so you’ll have to purchase them from a third-party instead.

Topcoat
To further seal in your details and add a finishing semi-gloss, gloss, or matte look to your kit, you can use topcoat. Topcoat can be airbrushed on, but it also comes in spray cans as well. I personally prefer the matte look, but each person has their own preference.
I use the topcoat from Mr. Hobby. Just make sure you spray it on evenly and gradually so you get a smooth finish. Also, make sure where you are spraying is well-ventilated as the chemicals are harmful to breathe in. I always wear a mask when painting, and you can check out the one I use here.
This is the final step I personally take before displaying my kits. Keep in mind, though, if you are going to decal and panel line your kits, you’ll want to do so first before you apply topcoat.
Where to Buy Gunpla Kits
Here are some of my favorite, trustworthy places you can buy kits from both online and in-store.
If you are looking to buy online, I highly recommend buying from Newtype HQ, USA Gundam Store, Gundam Planet, or Premium Bandai US. They have some of the largest selection of kits you can find in the United States. In addition, USA Gundam Store, Gundam Planet, and Newtype HQ sell pretty much everything you need to build Gunpla, like tools, paint, lighting kits, etc. These three are more so one-stop shops for Gunpla than others on this list, so they are great places to start.
There are some retail stores, like ThinkGeek and Barnes & Noble that carry Gundam model kits as well, but they only release certain kits in-store. My local stores don’t have a crazy selection of kits to choose from, but they do have kits you can browse. Sometimes you can also get coupons for Barnes & Noble that’ll give you 20% off a kit, which comes in handy when buying the more expensive grades.
As far as specialty shops go, there are some that sell Gunpla, in addition to anime figures, so if you are into both these are great places to shop. They are: Galactic Toys, BigBadToyStore, and Nakama Toys. But, USA Gundam Store and Gundam Planet also carry a select range of anime figures as well, so that’s something to keep in mind as well. Also, Galactic Toys sells building tools as well, so that’s an added bonus when buying from them.
With that said, there are a lot of places to buy kits from these days, and you may even find some hobby stores that sell them as well. I personally love checking out my local HobbyTown. They have a great stock of paints, tools, decals, kits, and more to browse.
Hopefully this post will prove helpful to those of you who are looking to get into Gundam modeling. I’ll add some more advanced posts in the future, so keep an eye out for those as well!